
Creating and Adding a Team
Teams can help break up your users into easily manageable groups with a single role. Create teams for marketers, developers, contractors, and more. Learn how to add a team to your instance
Create a Team
Follow these steps to add a team to your instance.
-
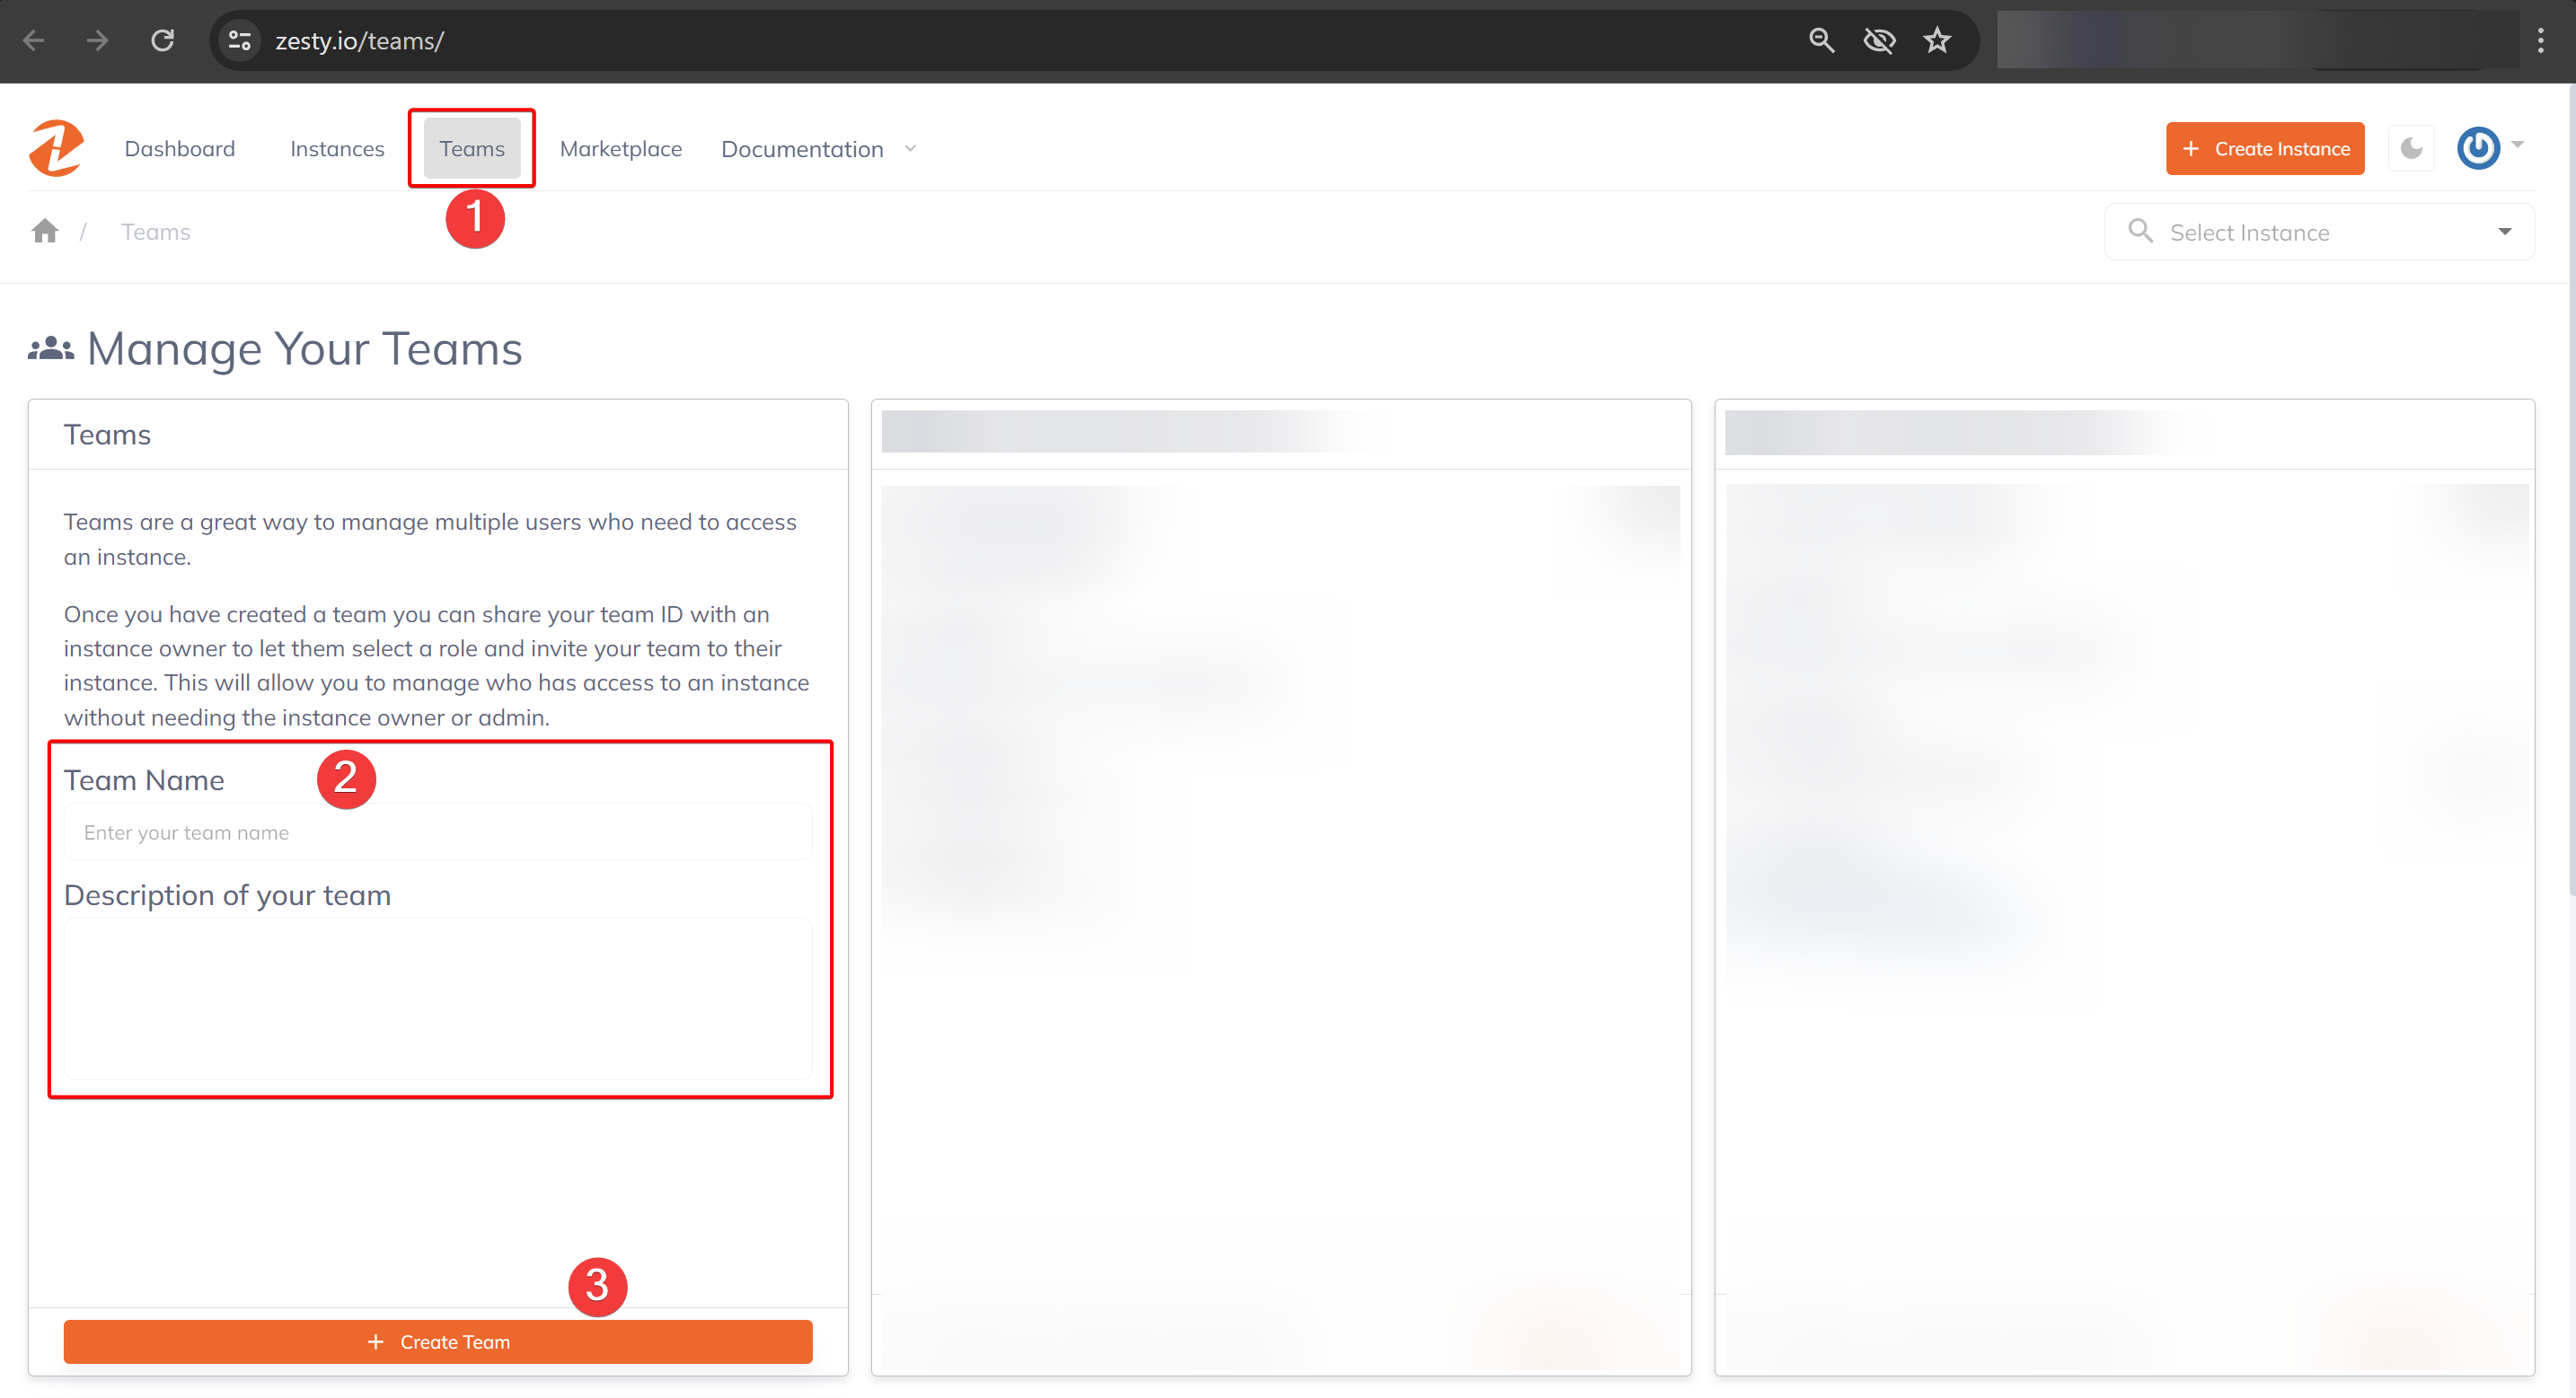
Login to Zesty.io and click on Teams found at the upper left navigation bar.
-
To create a Team, fill out the Teams form with a team name and description, then click the + Create Team button.
- After creating a Team, you can now add Team members by entering the email addresses of your teammates in the input field, then click the + Invite button to invite them to your team.
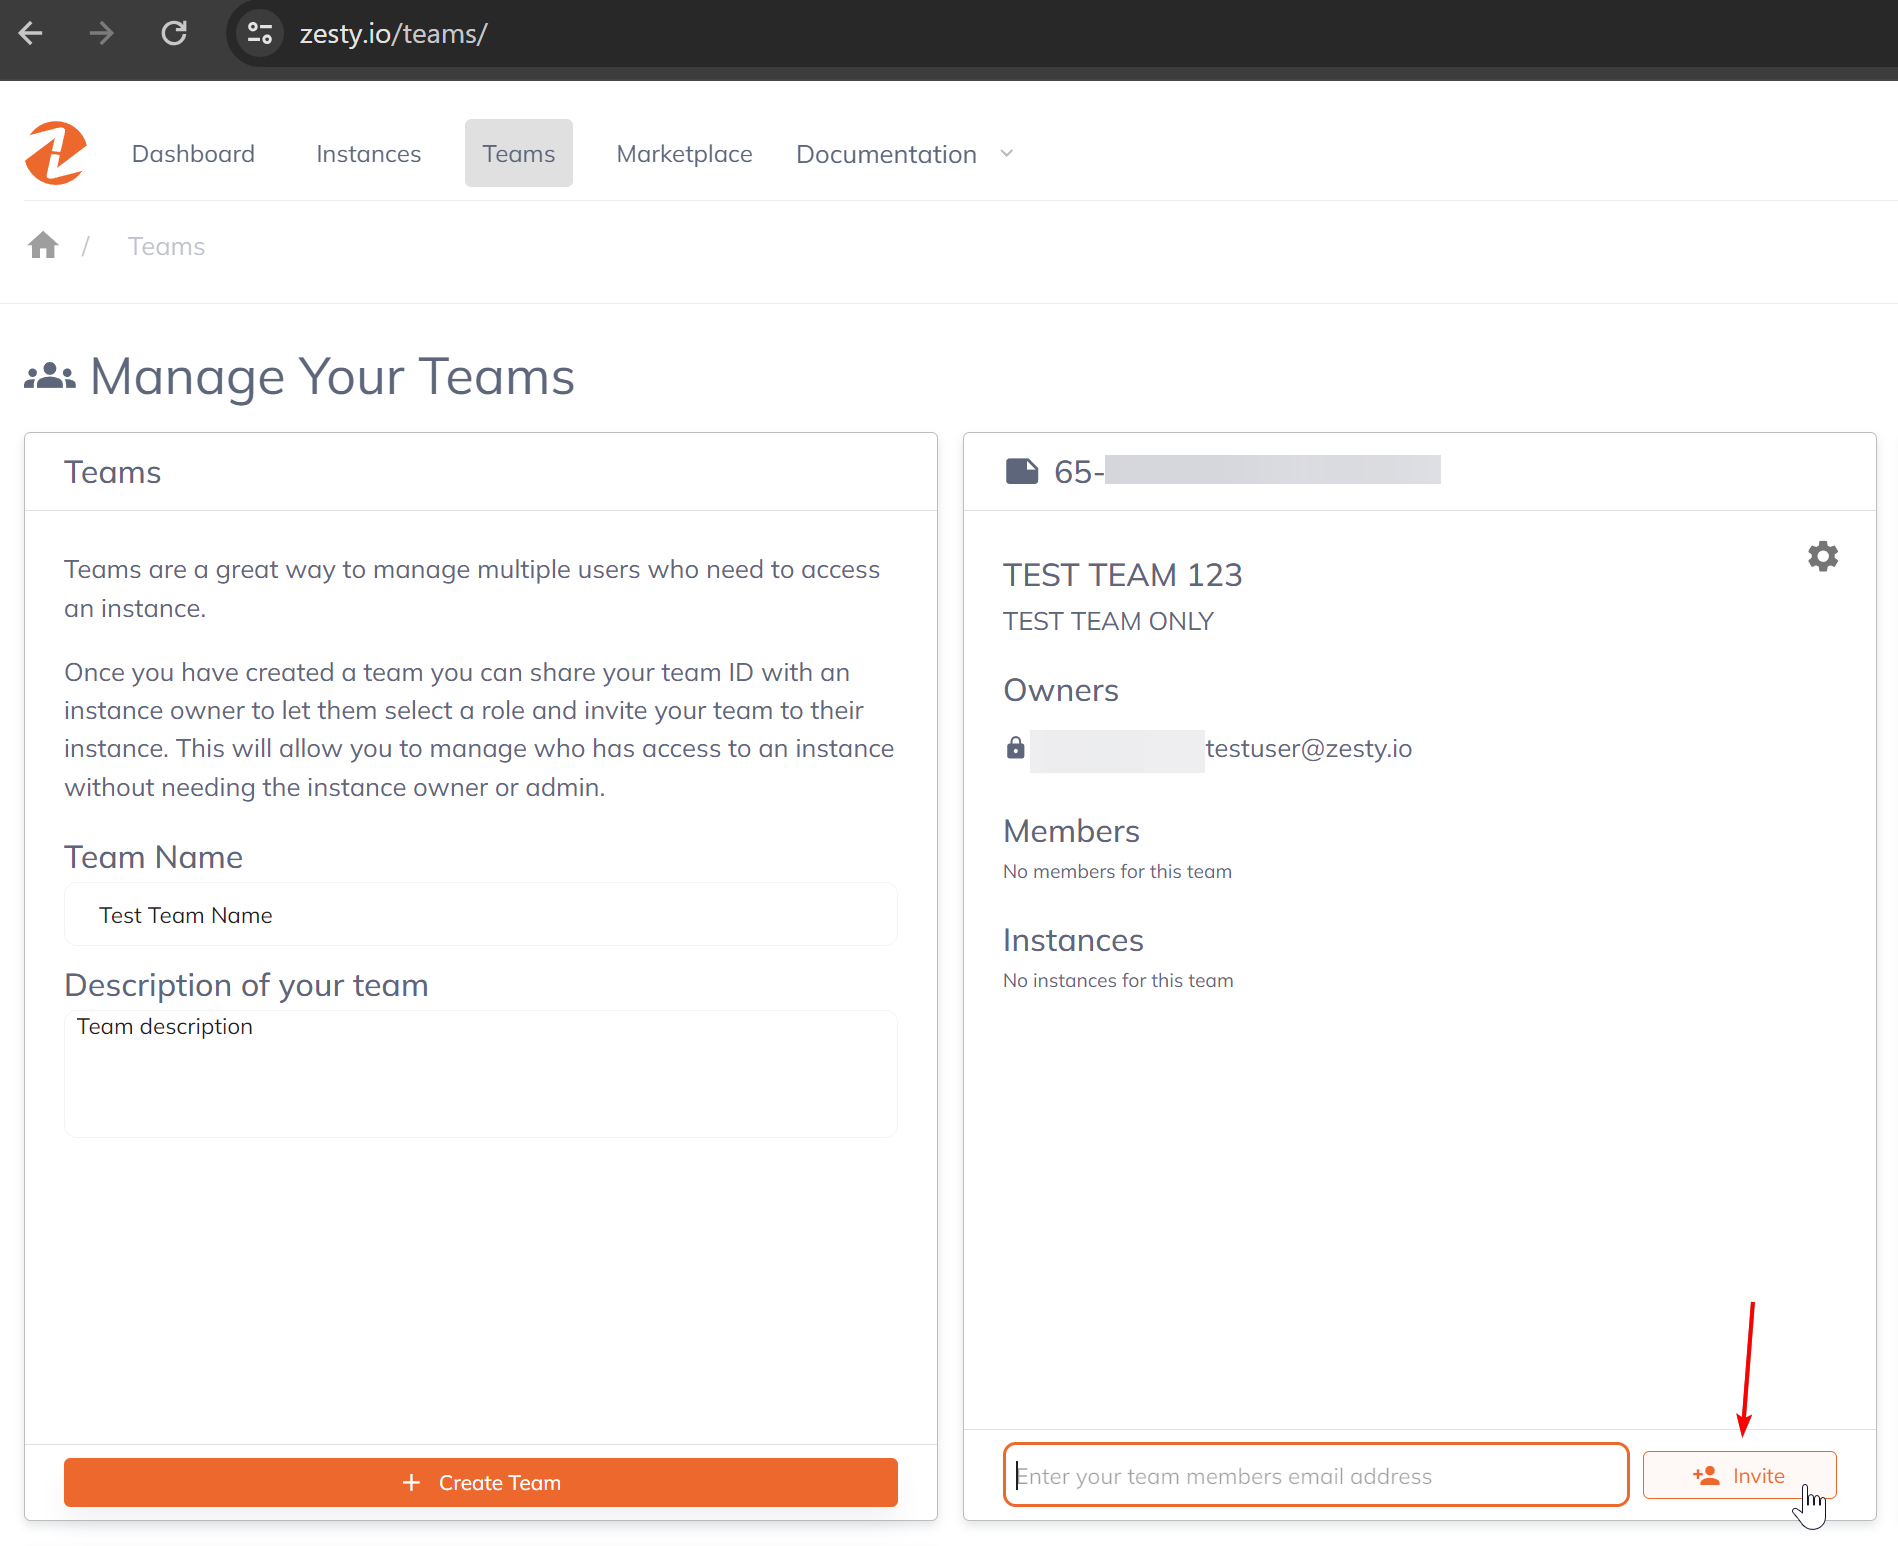
Note: If an invited user is not yet a Zesty.io user, they will need to create an account before they can accept your Team invite.
Congratulations! You created your first team. Now let's add it to your instance.
Add a Team to Your Instance
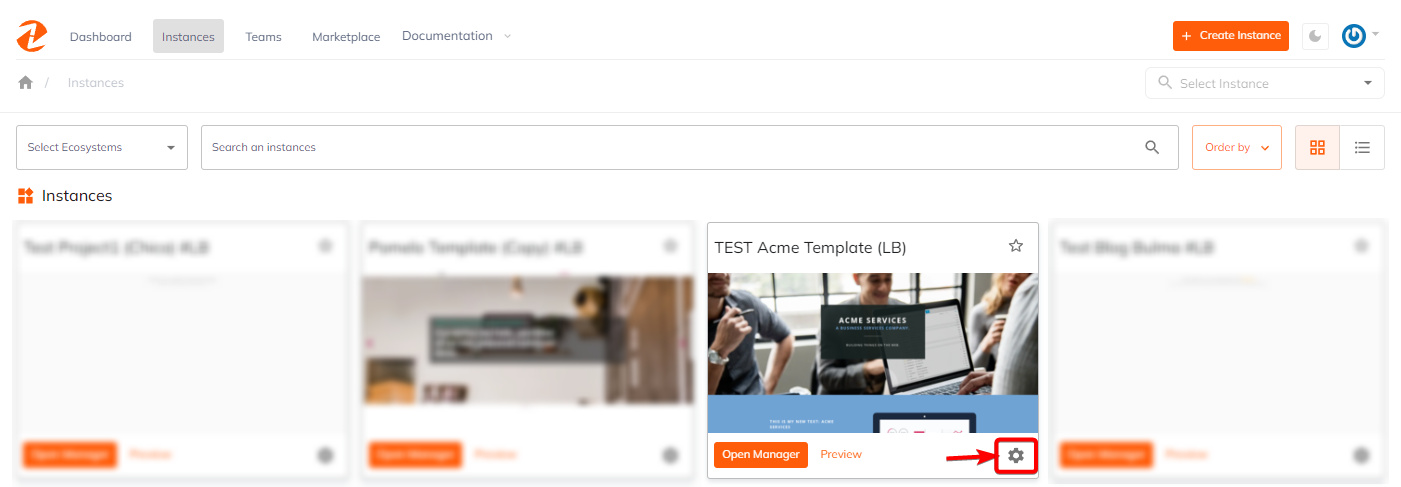
- Locate the instance that you want to add your team to, then click the settings cog icon to access your instance's settings.
- Go to Instance > Teams then click the + Add Team to Instance. Select a Team Name, and a Team's role, and then click the Submit button. Once submitted, the Team will now be added to the specific Instance.
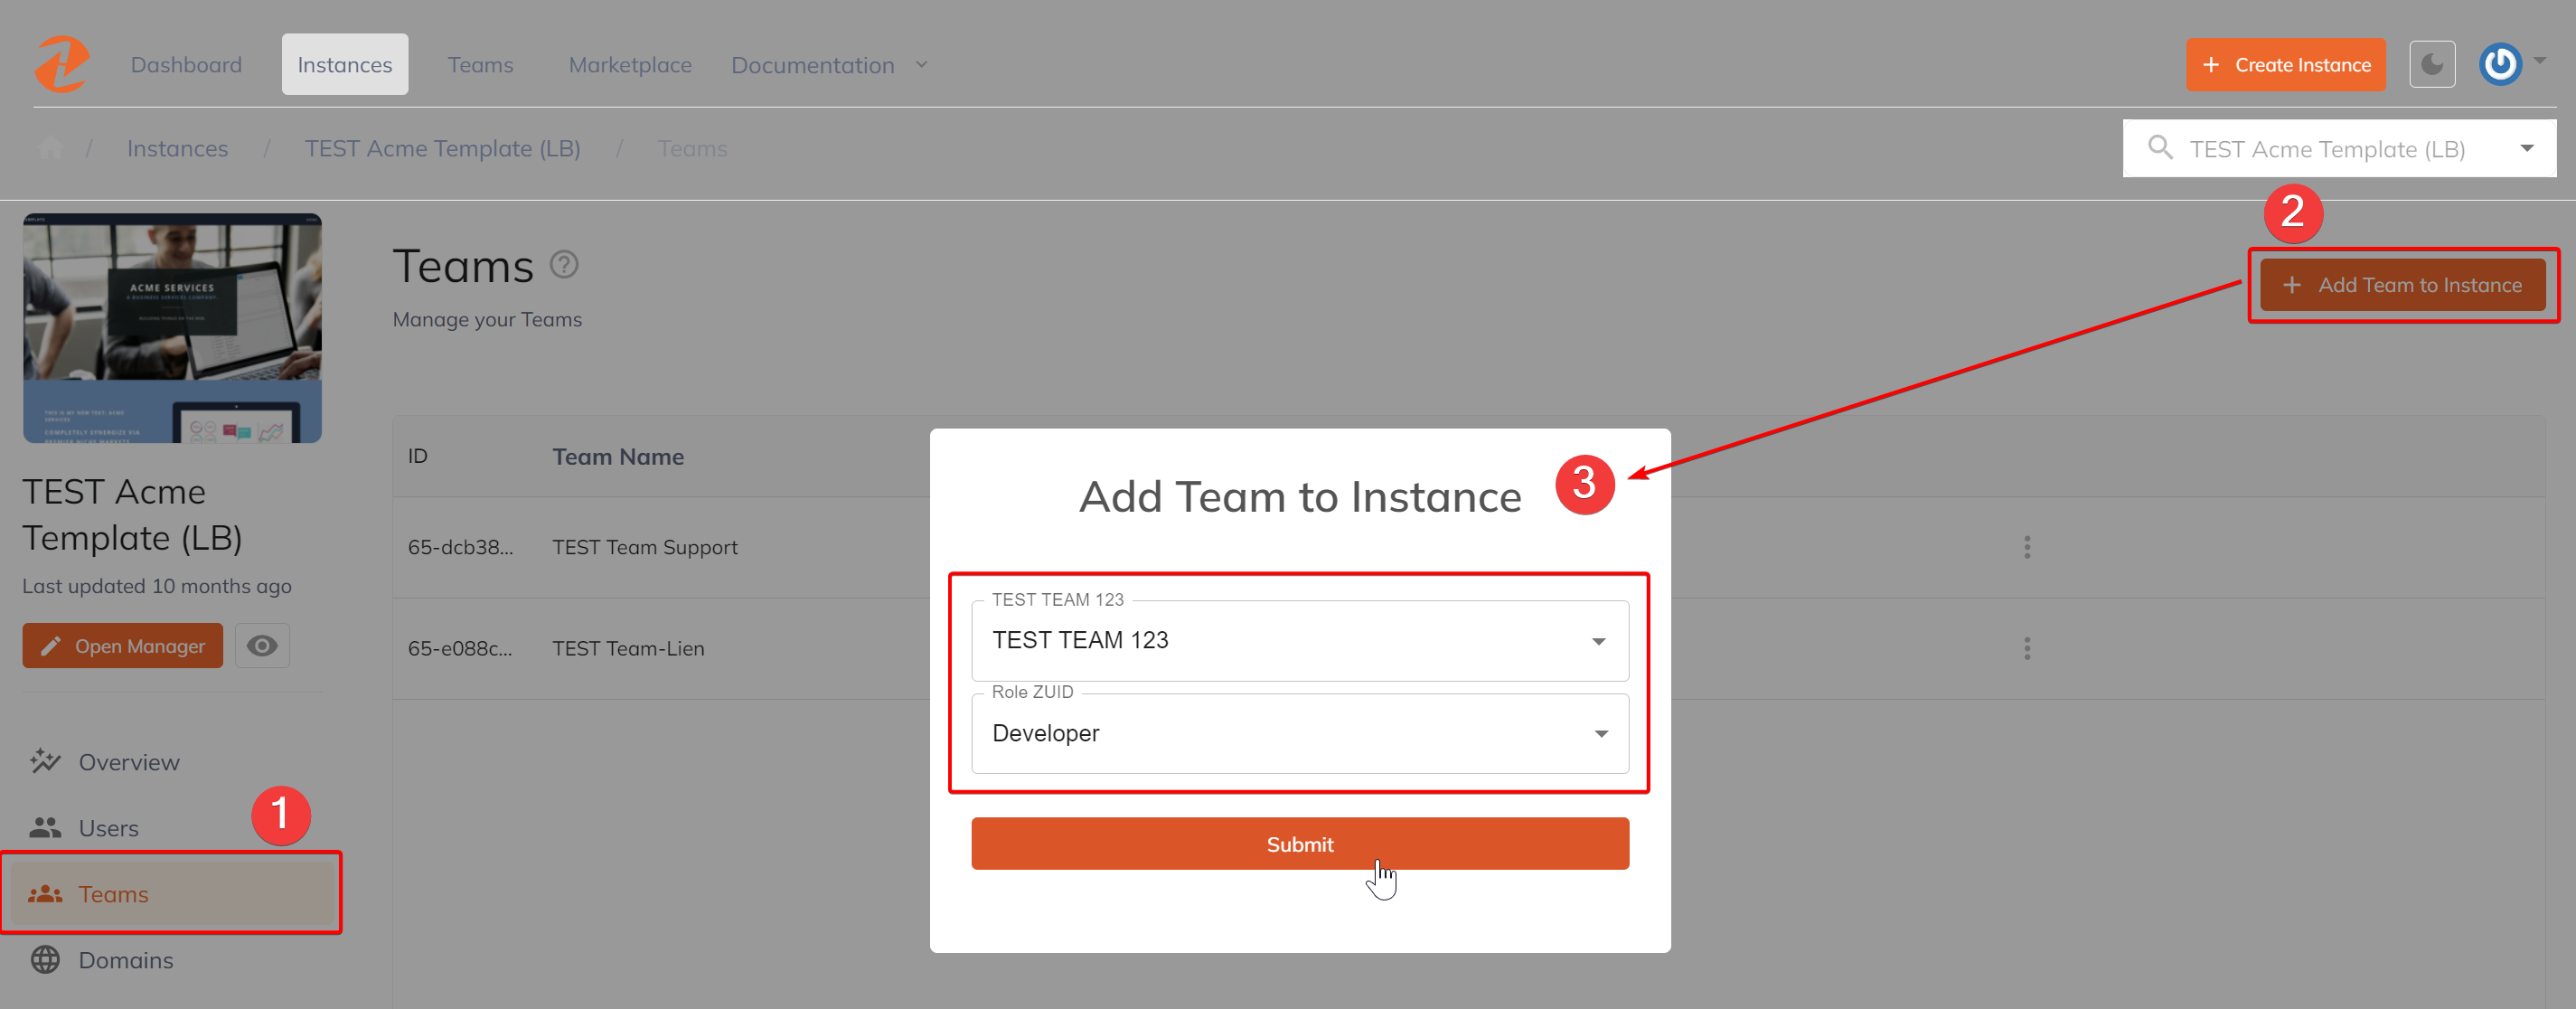
If a Team's member already has access to your instance via an individual invite and has a different role set than the Team's role then that member's individual role will override their Team role.
Congratulations! You just added your team to your instance.
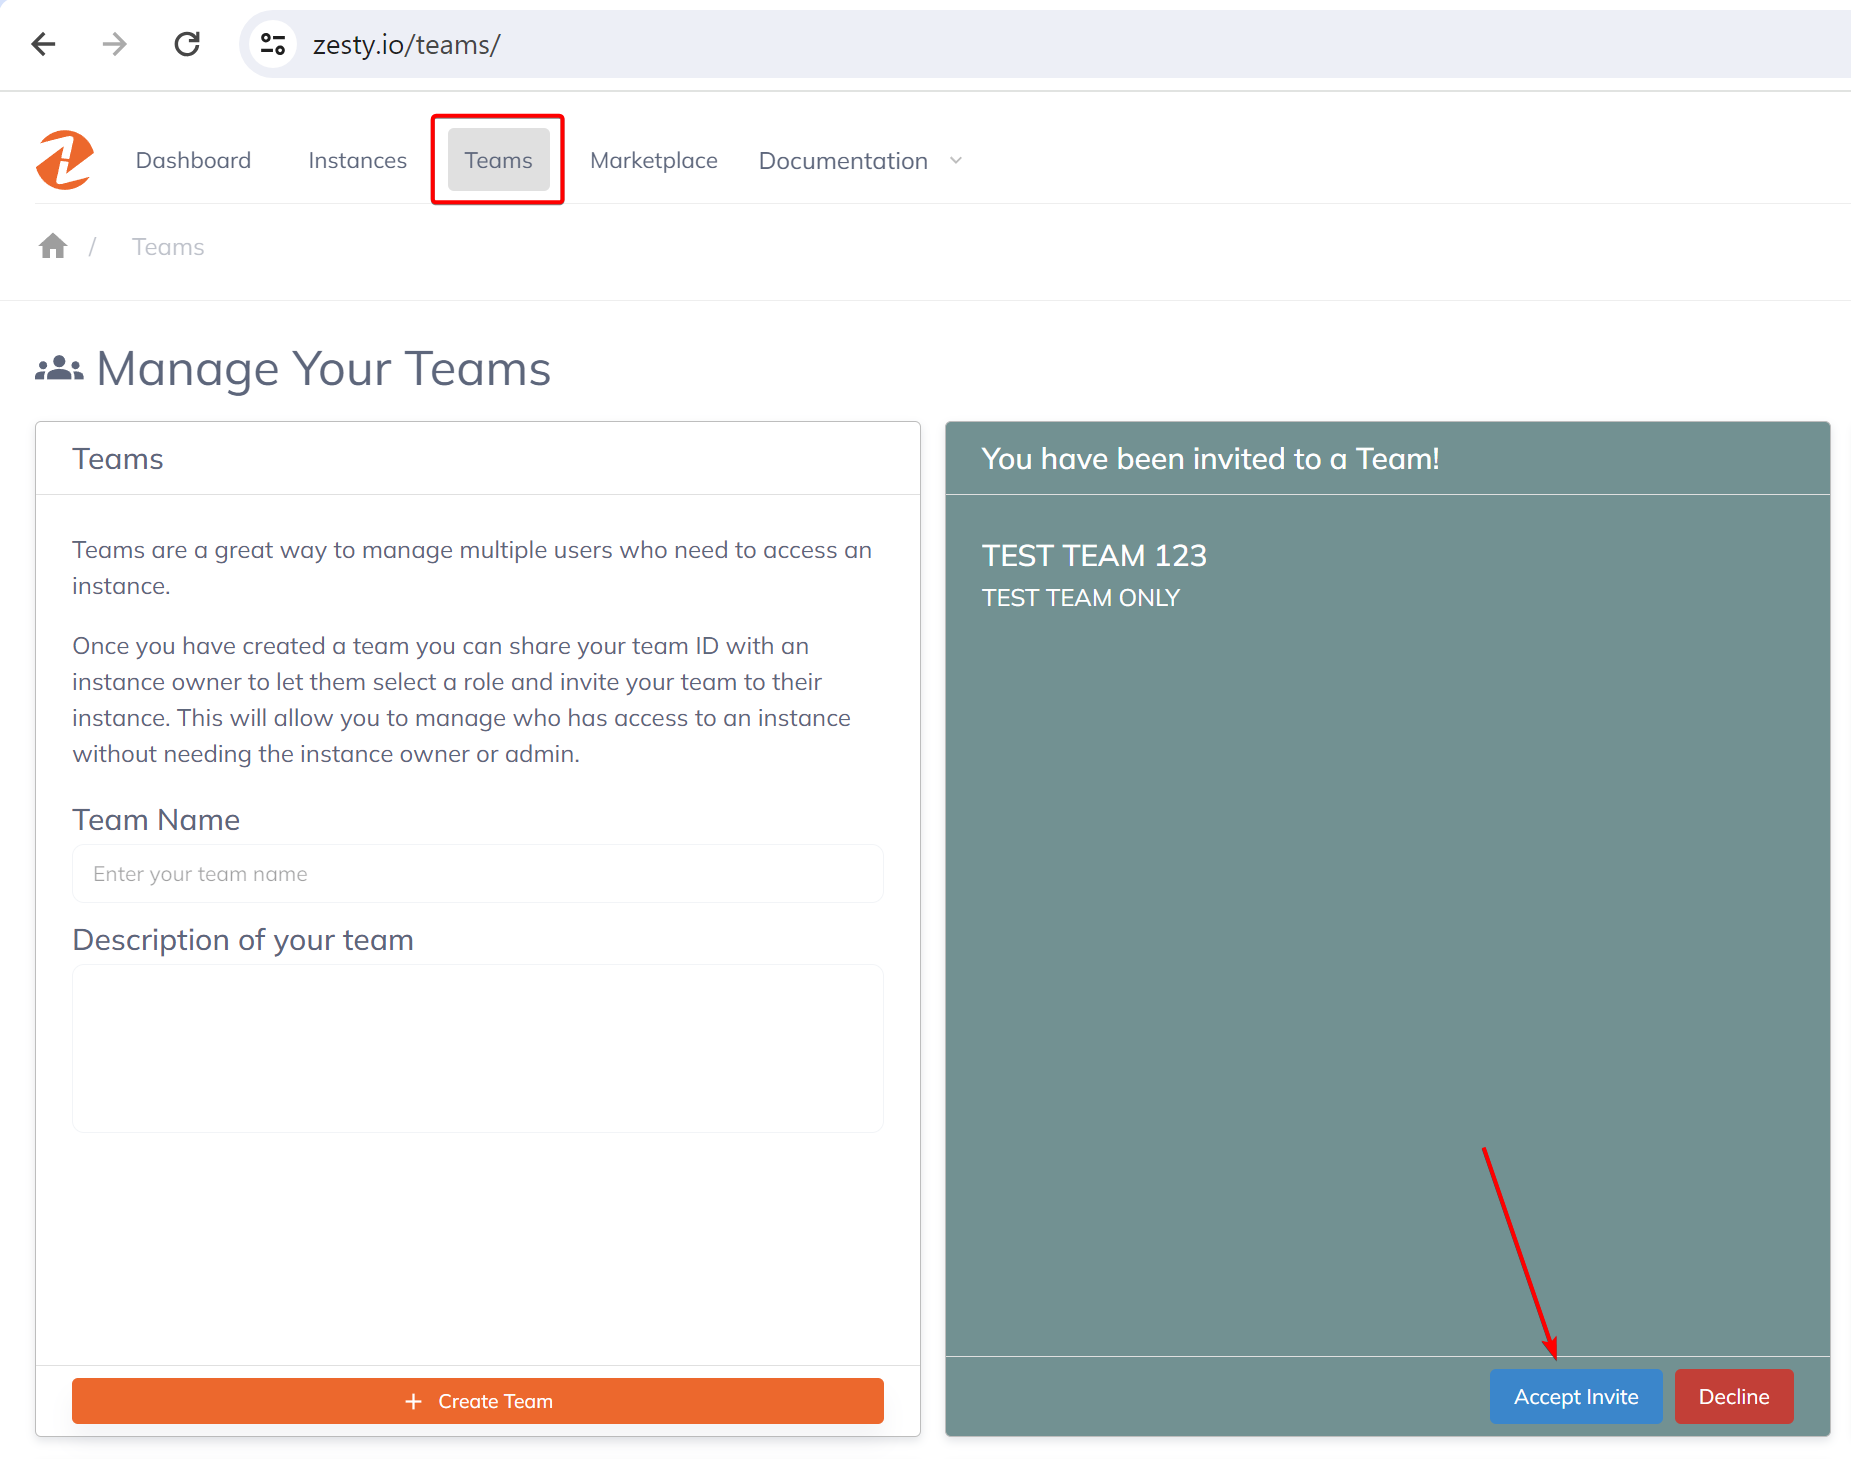
Accepting an Invite to a Team
In order to accept an invite to a team, navigate to the Teams interface (found at the upper left navigation bar), and click the blue Accept Invite button.
Updated 1 day ago