
How to Launch an Instance
It's easy to launch your instance with Zesty.io. Simply set your domain, configure your DNS, and then confirm your site is live.
This guide is for launching instances with custom domains. Please disregard this if you're using the defaultzesty.dev domains.
There are 3 steps to making your instance accessible to the public.
- Set a custom domain name
- Configure your DNS
- Confirm your instance is live
Before beginning the process to send your instance live ensure that all content and code that you want to be made available to the public are published and listed accordingly.
Zesty.io New Site Launch Checklist
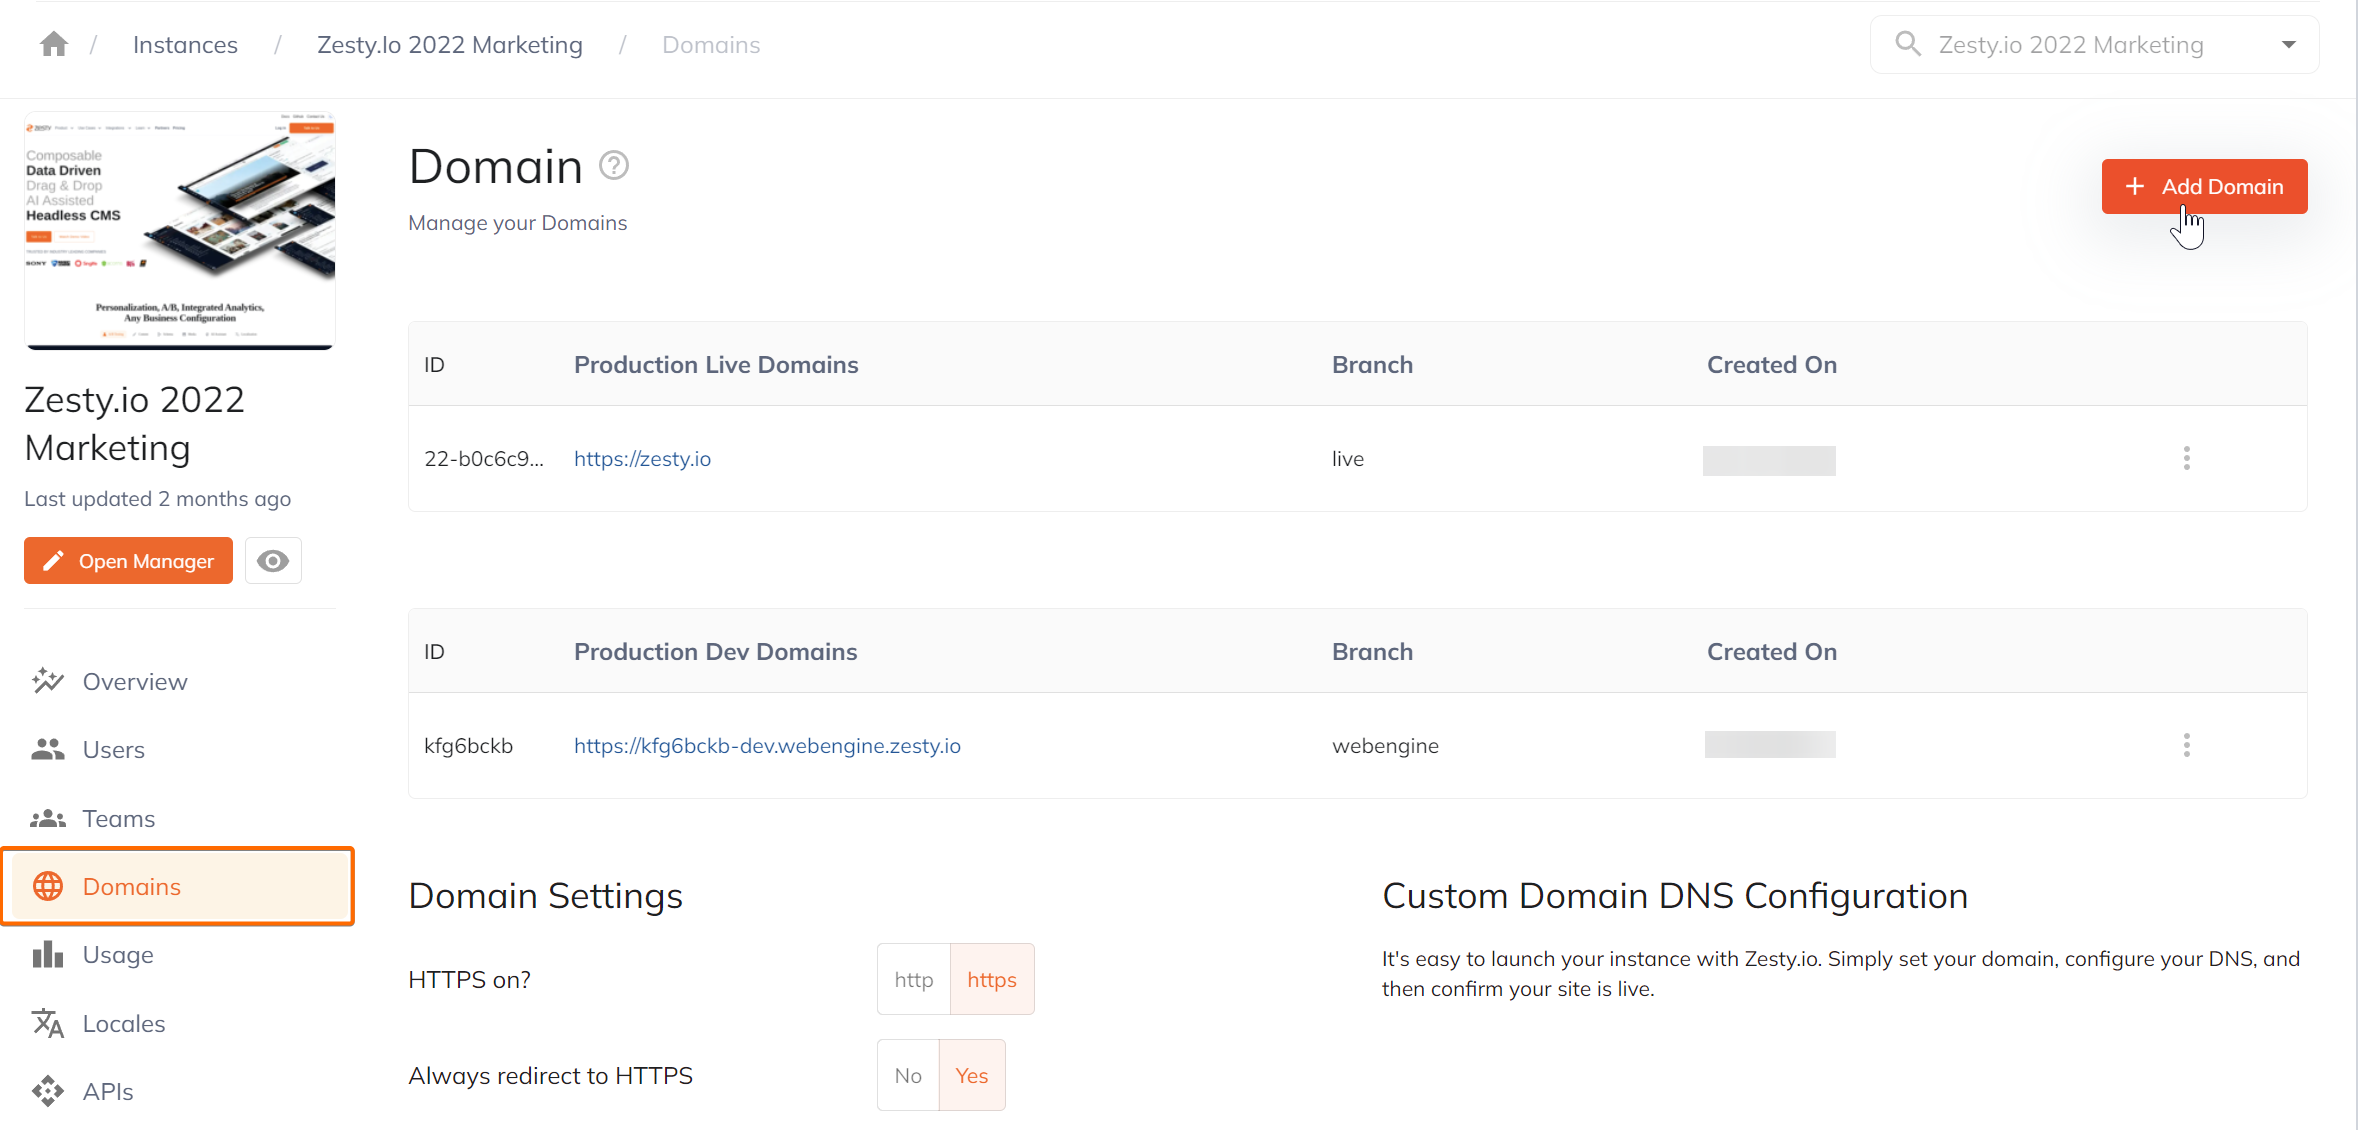
Set a Custom Domain Name
Start by opening your instance then go to Domains section.
On the top right corner, click Add domain to create/add a custom domain.
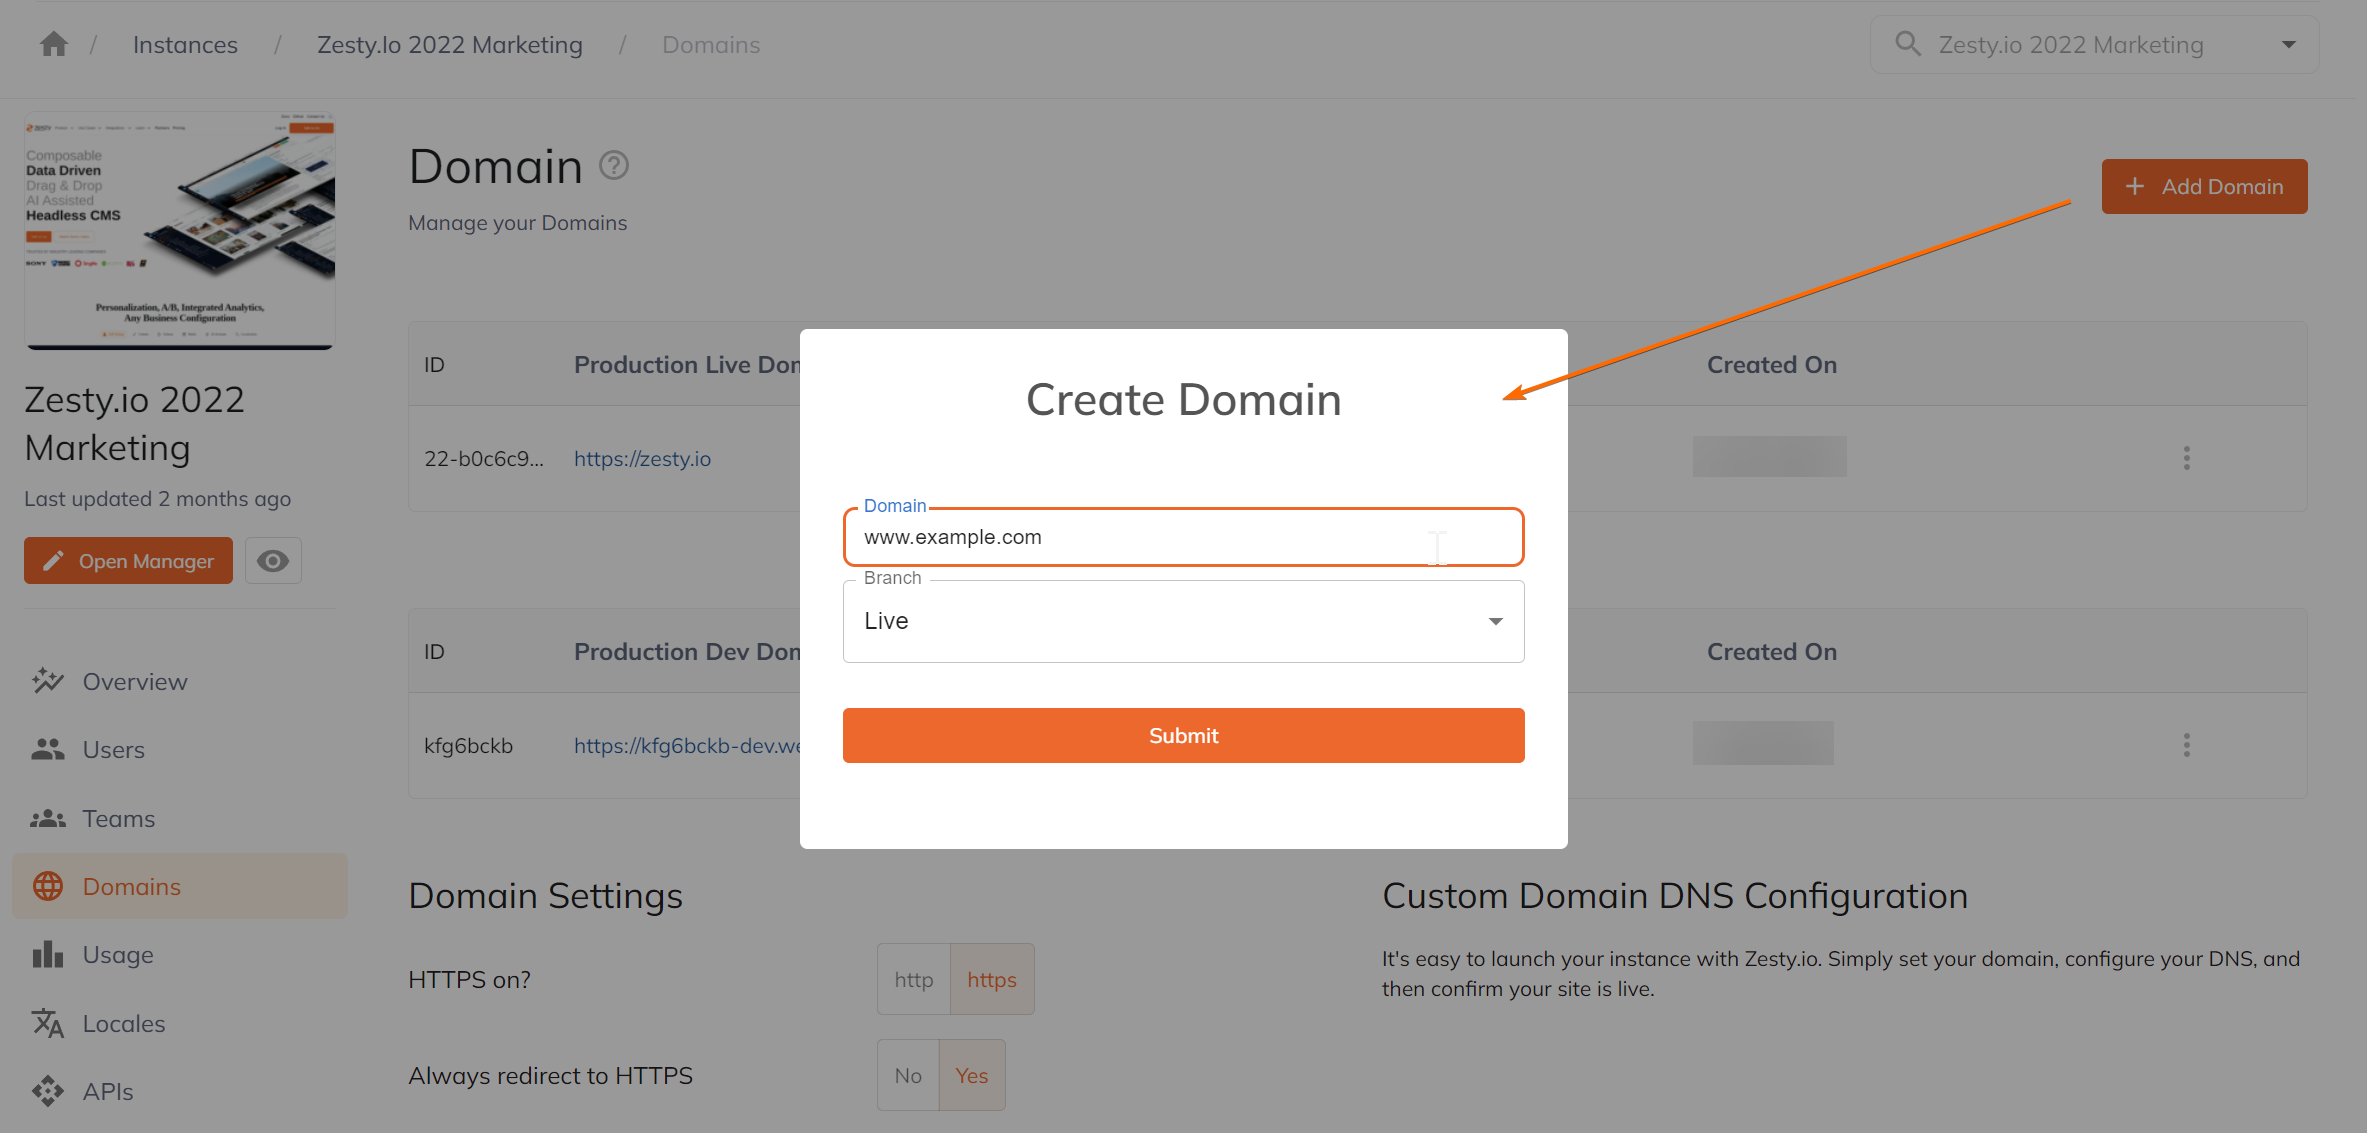
In the Create Domain modal, add your custom domain and select the domain branch (Live/Dev) then hit Submit.
Configure your DNS
Hybrid OYD: If you are setting up a domain with Hybrid Zesty.io, please follow this guide
Configure your domain's DNS settings by following the instructions as below.
Note: Domain registrars are not one-size-fits-all so each step may not be applicable. See the Common DNS Registrars section below for more information.
Cloudflare Users: When setting DNS records in Cloudflare be sure to have the proxied by Cloudflare, an orange cloud icon, turned off on each record. Zesty.io cannot effectively manage the cache if Cloudflare is proxying requests and caching them.
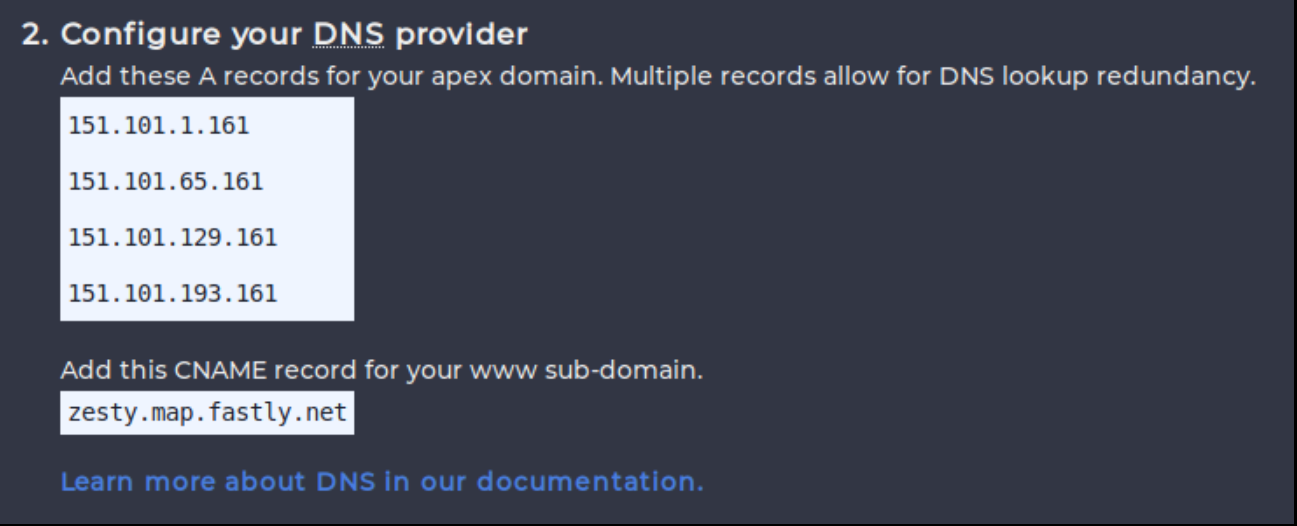
There are 2 primary records you will want to ensure are setup.
- The apex record (e.g. example.org)
- The WWW sub-domain record (e.g.www.example.org)
When creating these records there will be 3 values that are required to set them up.
- Record type
- Host (or name)
- Value.
Apex Record
Why can't I use a CNAME for my apex record?
Create or set an existing apex record with the following values:
- Record type:
A - Host:
@ - Value (Create a separate A record for each of these IP addresses):
151.101.1.161151.101.65.161151.101.129.161151.101.193.161
The
@symbol is a special value in DNS that means, the current domain.
WWW Record
Create or set an existing WWW record with the following values:
- Record type:
CNAME - Host:
WWW - Value:
zesty.map.fastly.net

Note: DNS changes can take time to propagate and for your ISP to pickup. They can also be cached. If you don't see your changes taking effect try loading the domain in a new browser and/or giving it more time. Typically, an hour or two is enough.
Additional Configurations
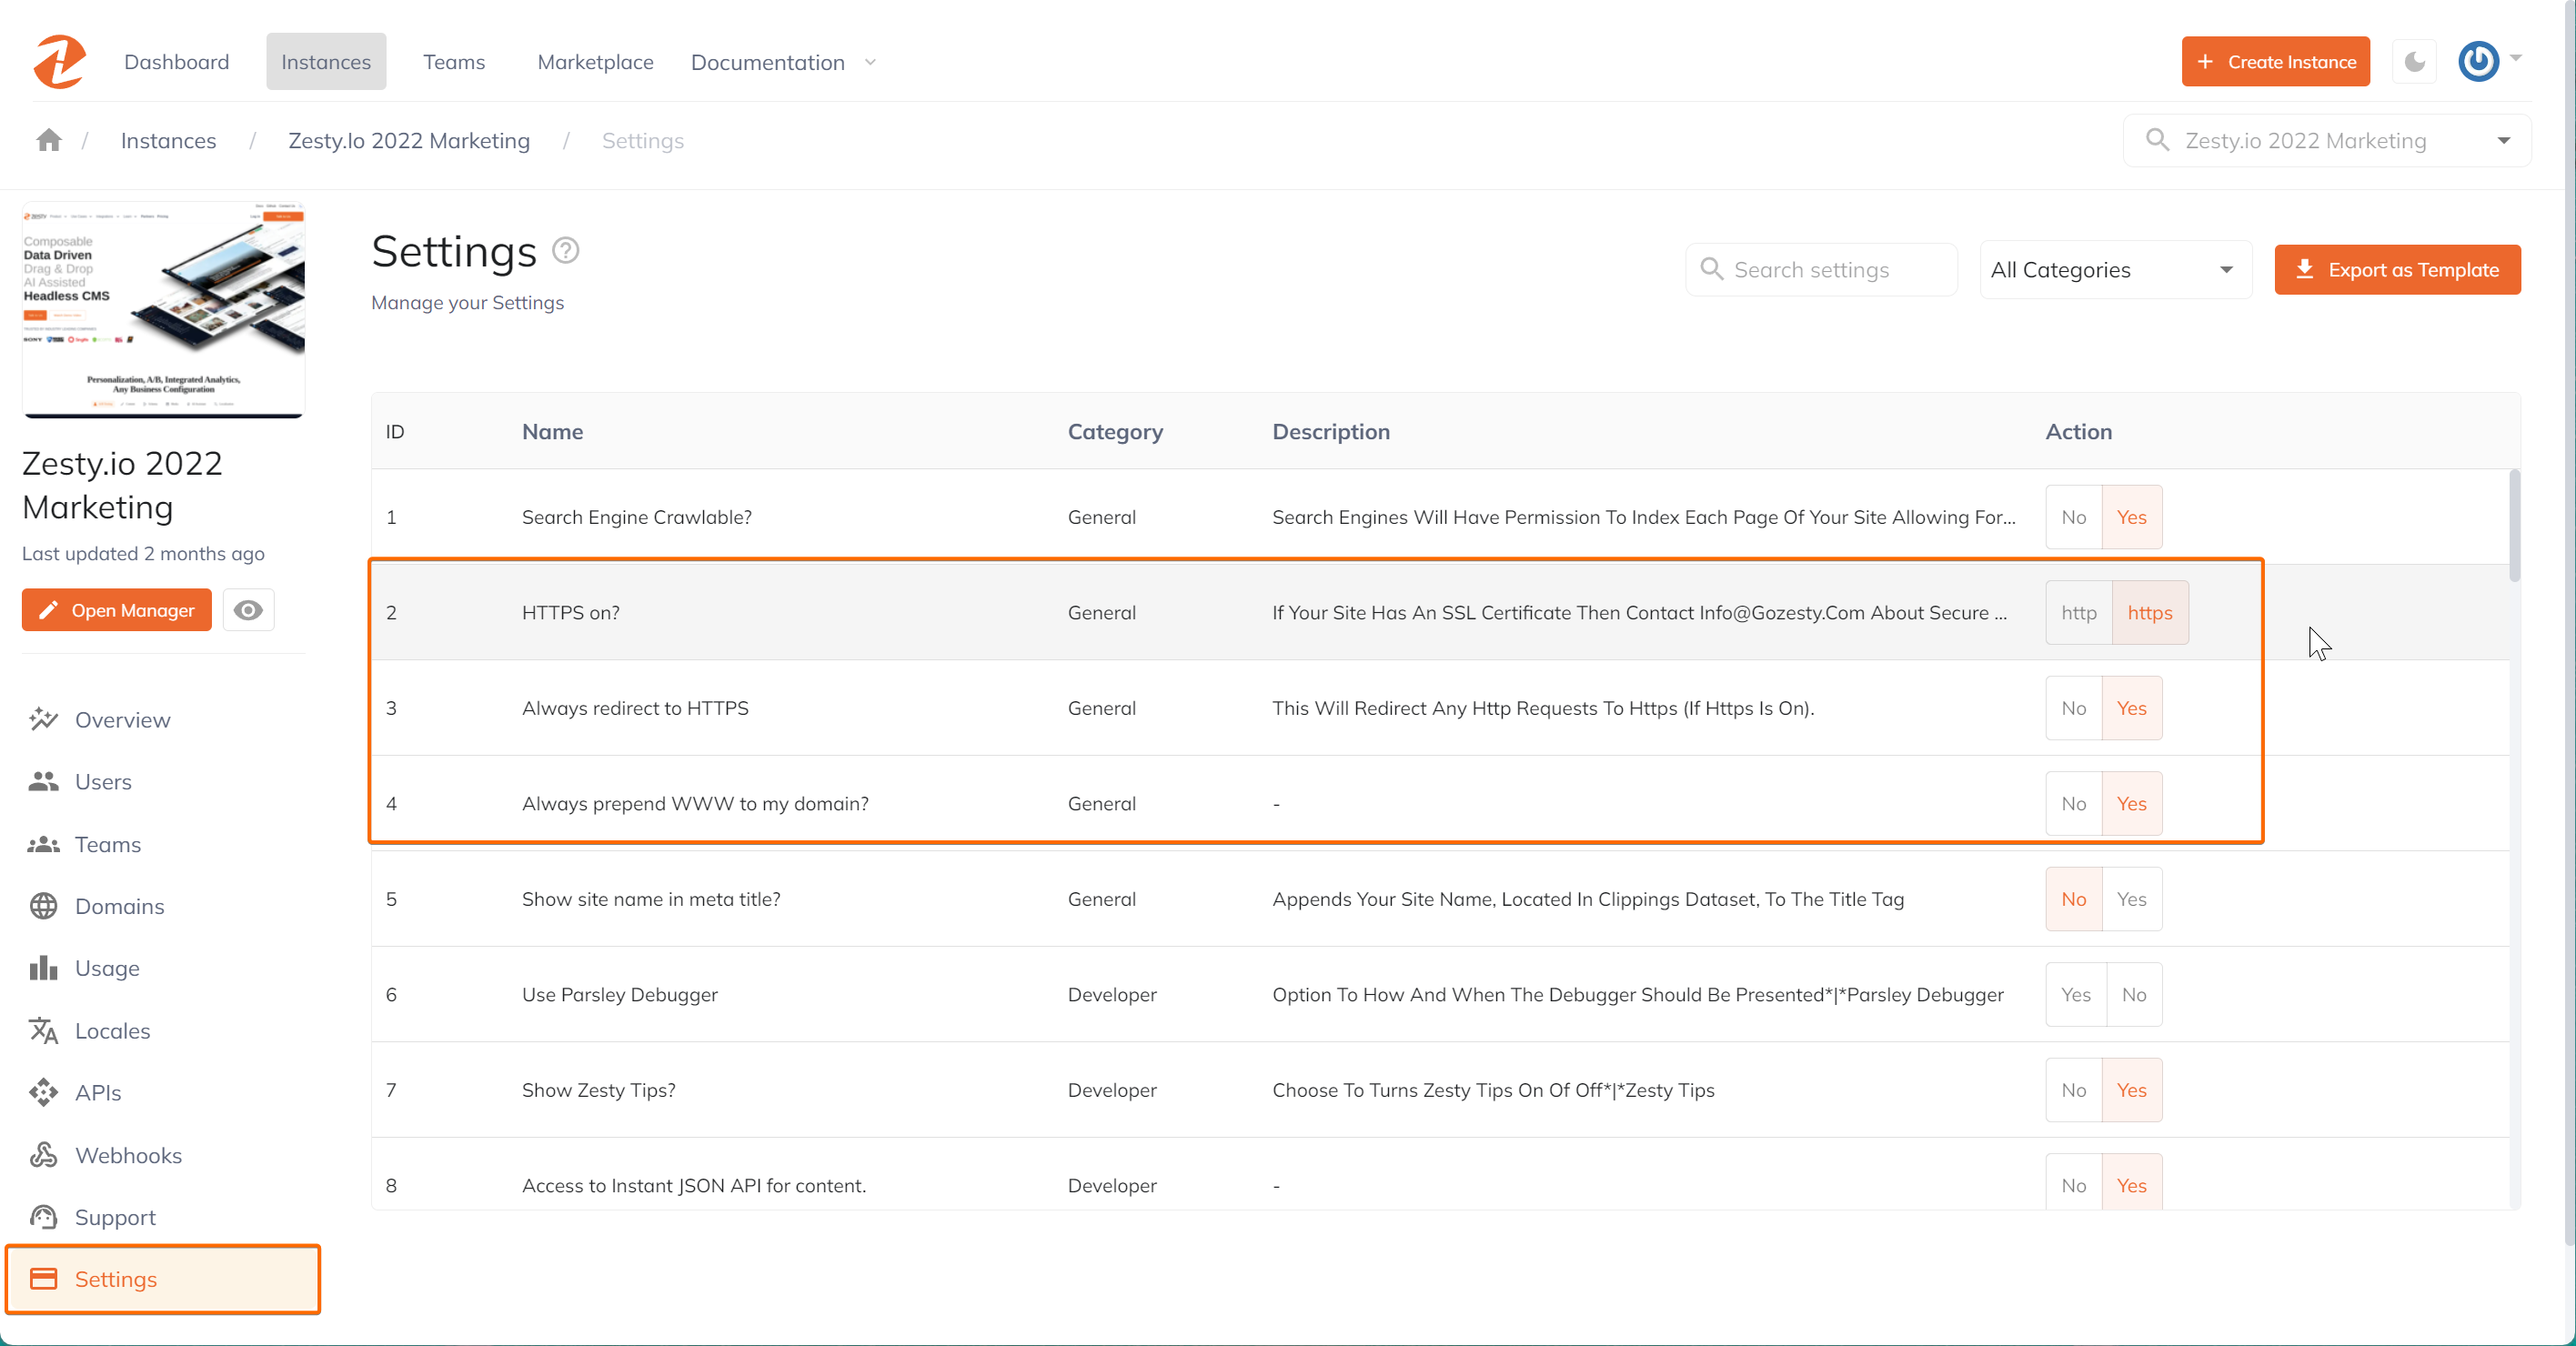
HTTPS & WWW
As necessary, you can configure your HTTPS and WWW settings before launching your site.
If you want to always redirect to HTTPS then the "HTTPS on?" setting must be turned on.
If you'd like to force prepending your domain with WWW then click the "Always prepend WWW to my domain?" button.
You can configure domain settings in the Domains section.
You can also access the domain settings under Instance Settings.
Refer to screenshot below.
Common DNS Registrars
Since there are many places to purchase domains it's difficult to create all-inclusive instructions to setting up a DNS record. Below you'll find some common DNS registrars and their setup instructions.
Swapping out domains
Note: Two instances cannot have the same domain assigned to it. Before the domain is added to a new instance it will need to be removed from the old one.
Removing a domain name
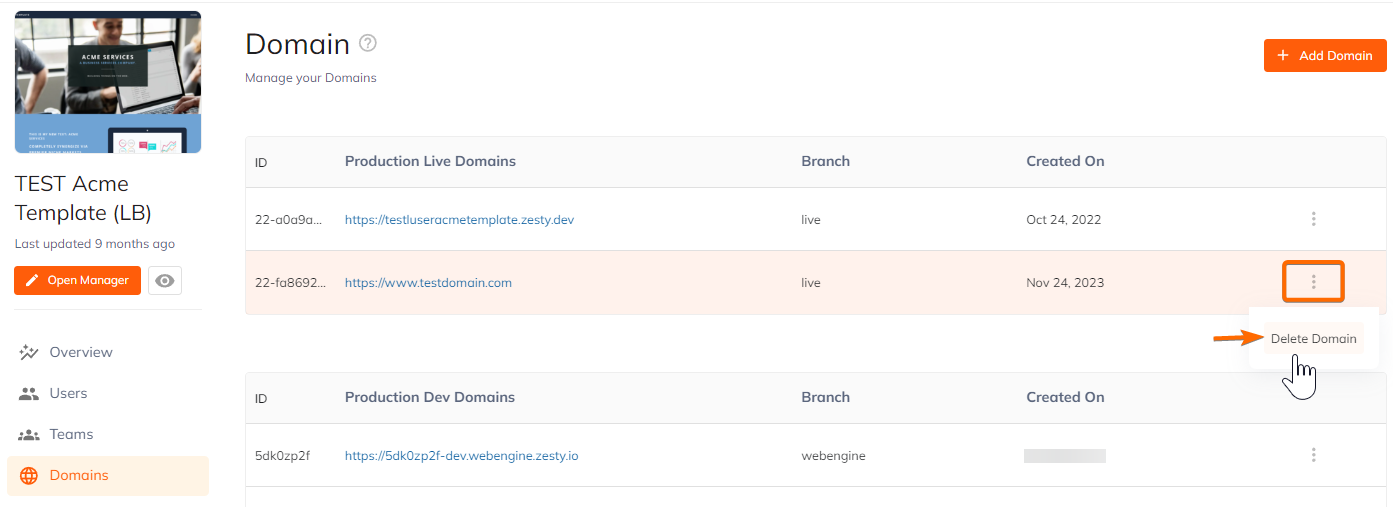
- In the Domains list, select a specific domain to delete. Click the three dots to see the option, then click Delete Domain. A message "Domain Successfully Deleted" will appear to confirm that the domain is now deleted.
After successfully removing the domain, you'll now be able to add that domain to another instance.
Updated 5 days ago