Instance Settings
The Instance Settings interface provides administrative control over publishing domains, vanity domains, users and team access, access tokens.
After creating your instance you will be redirected to that instance's Settings displayed in the Account Manager. You can also access settings by selecting any of your currently created instance from the Account Manager. The Instance Settings configure key aspects of your project including:
- Domain & DNS configuration
- Zesty vanity domains
- User and Team access
- Access token creation
- View selected and change blueprint
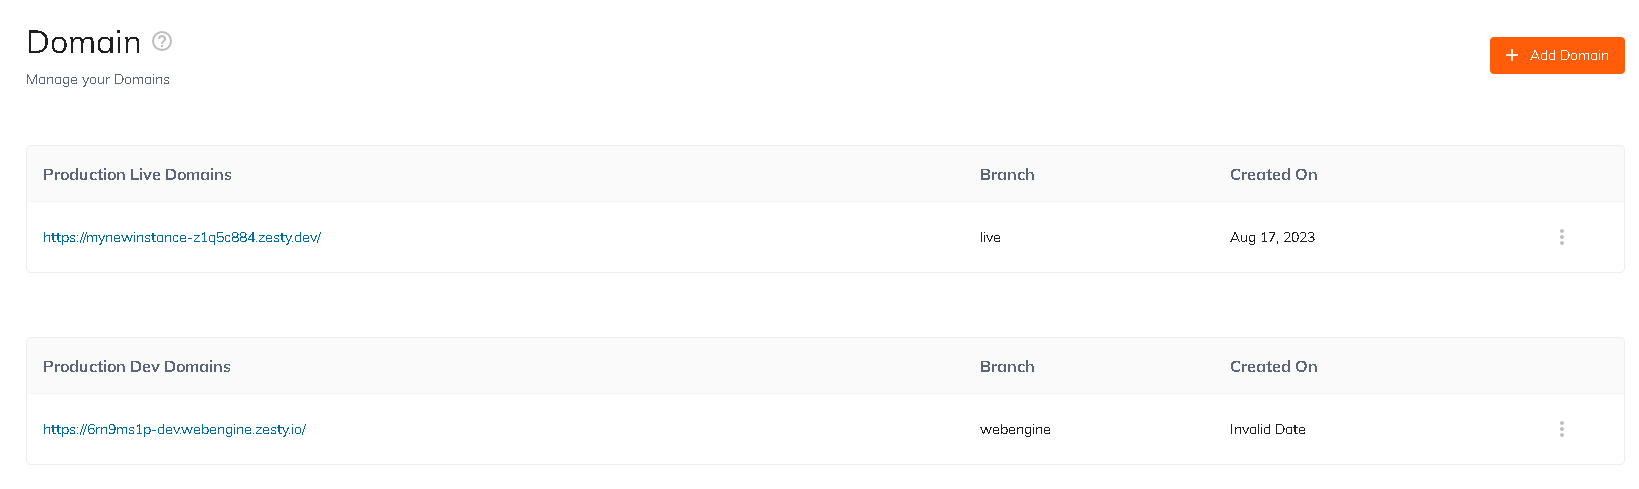
Domain & DNS Configuration
Here you can added in your owned custom domains and access DNS configurations. The DNS A records can be added to your domain's DNS settings. For additional setup information, see How To Launch an Instance.
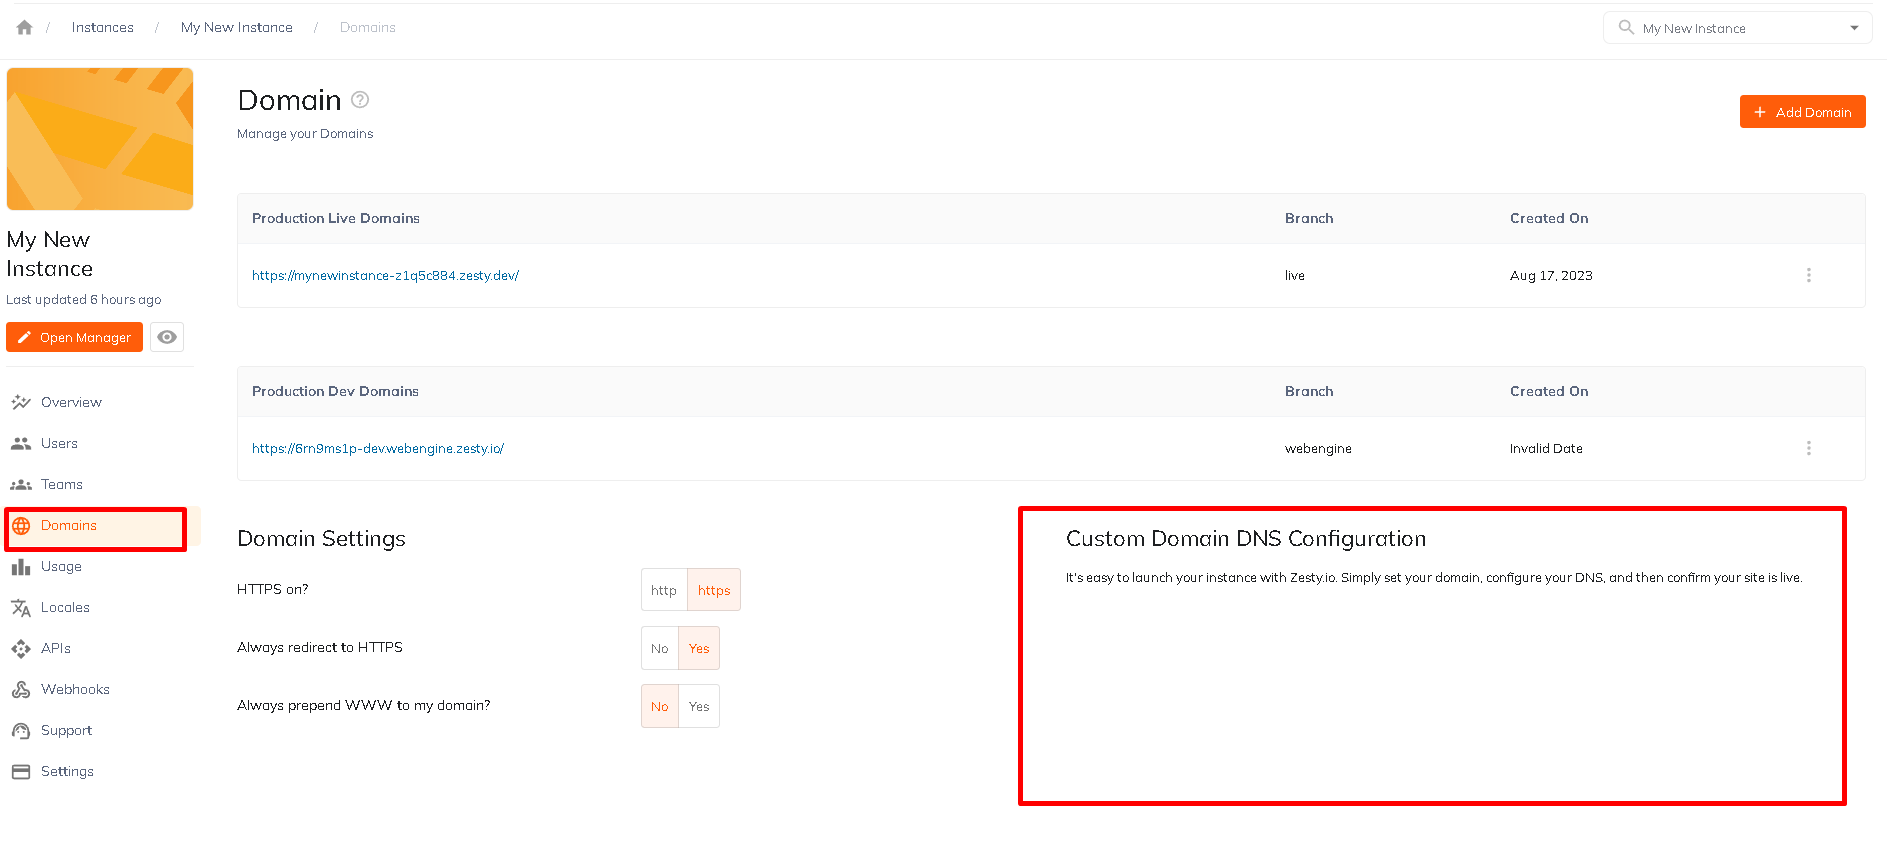
Zesty Vanity Domains
You can create domains using the default 'zesty.dev' vanity domain. These can be create in a live or dev environment by selecting the live or dev branch from the dropdown.
Zesty vanity domain example: myblog.zesty.dev
- Live domains: will display only the published content
- Dev domains: will display the latest draft of your content which will include published content and updated/new content that has been saved as a version but not yet published
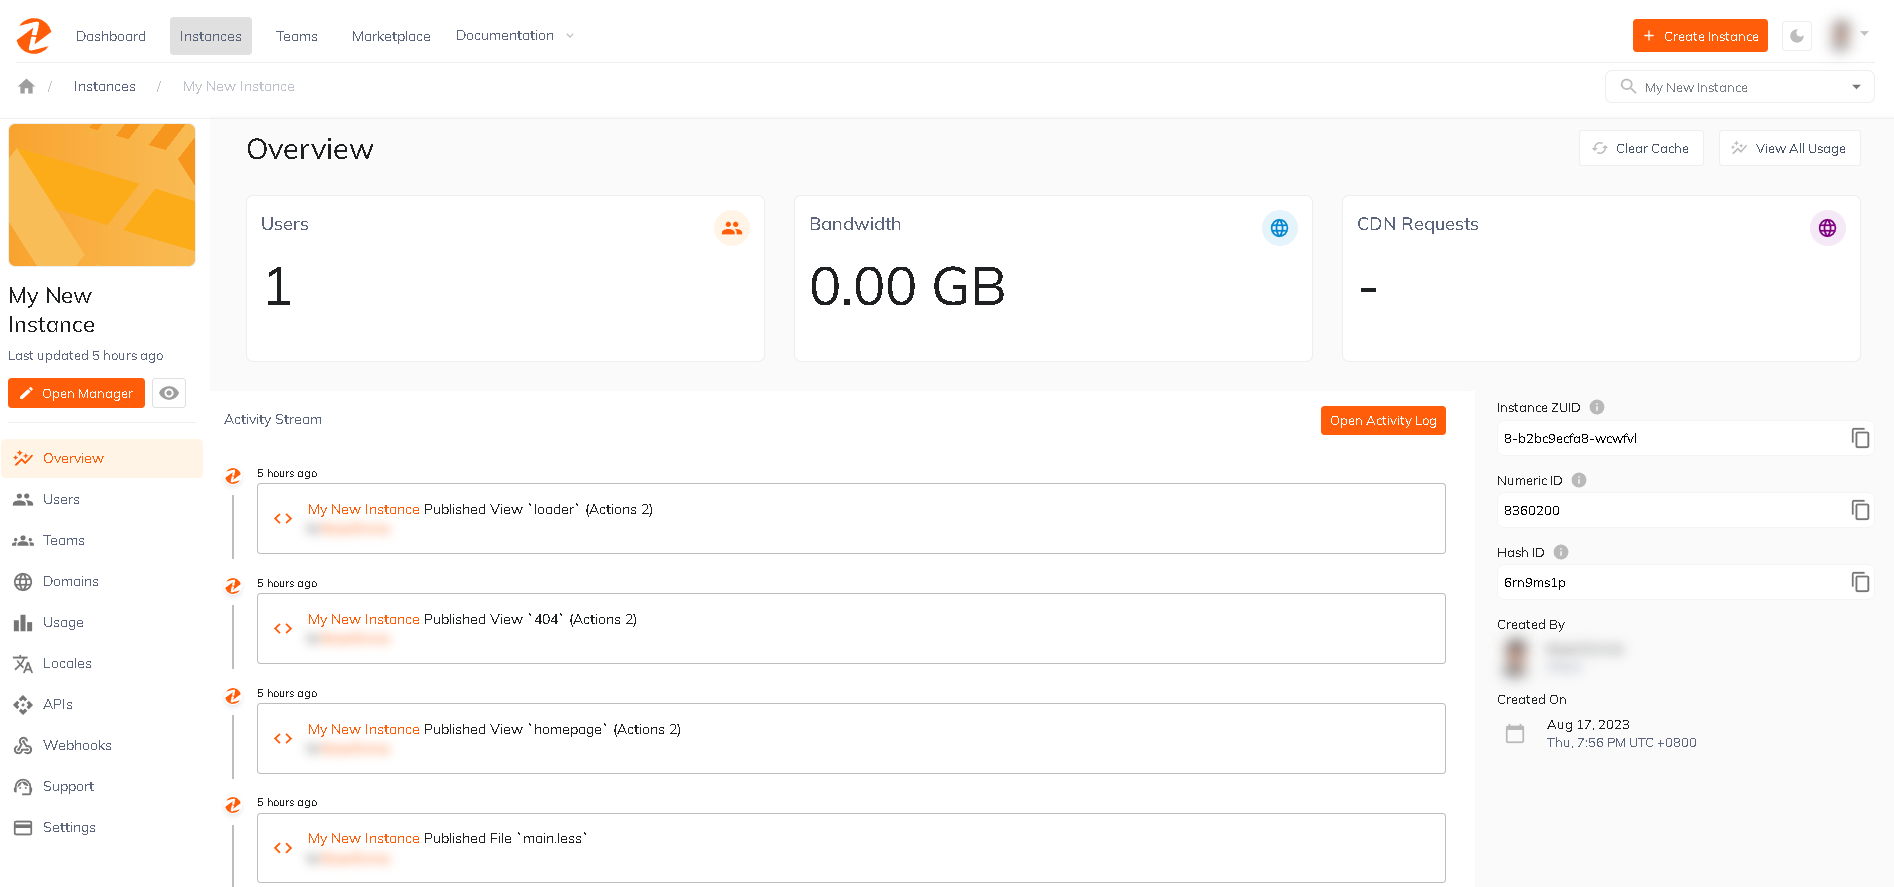
ZUID & Instance Details
Each instance created with a ZUID (Zesty.io Unique Identifier). This number creates accessibility to your instance. It will be used when running API calls, seeking support, and more.
Additional details regarding your instance are provided as well, shown below:
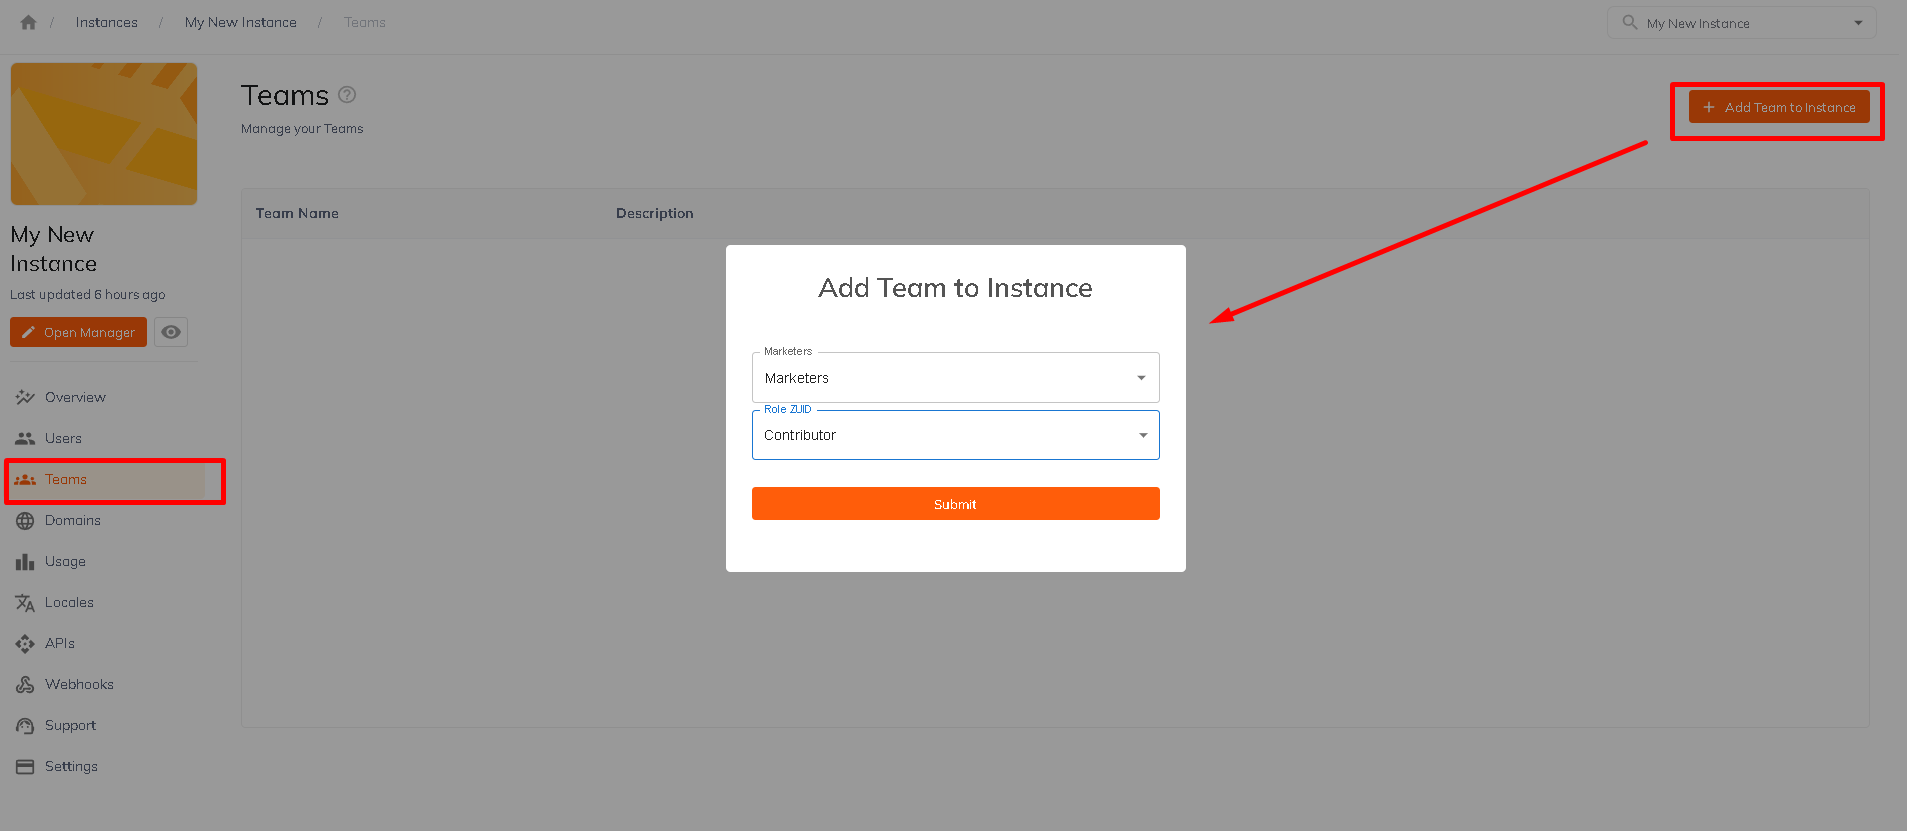
Adding Users and Teams
Each instance will need users and/or a team added. The user that creates the instance is given ownership and may add in the desired users/team. Users are assigned a role, which governs their control in the instance.
Roles & Permissions provides a breakdown of each role and their access reach

Teams will need to be created prior to adding them. Refer to Team creation instructions
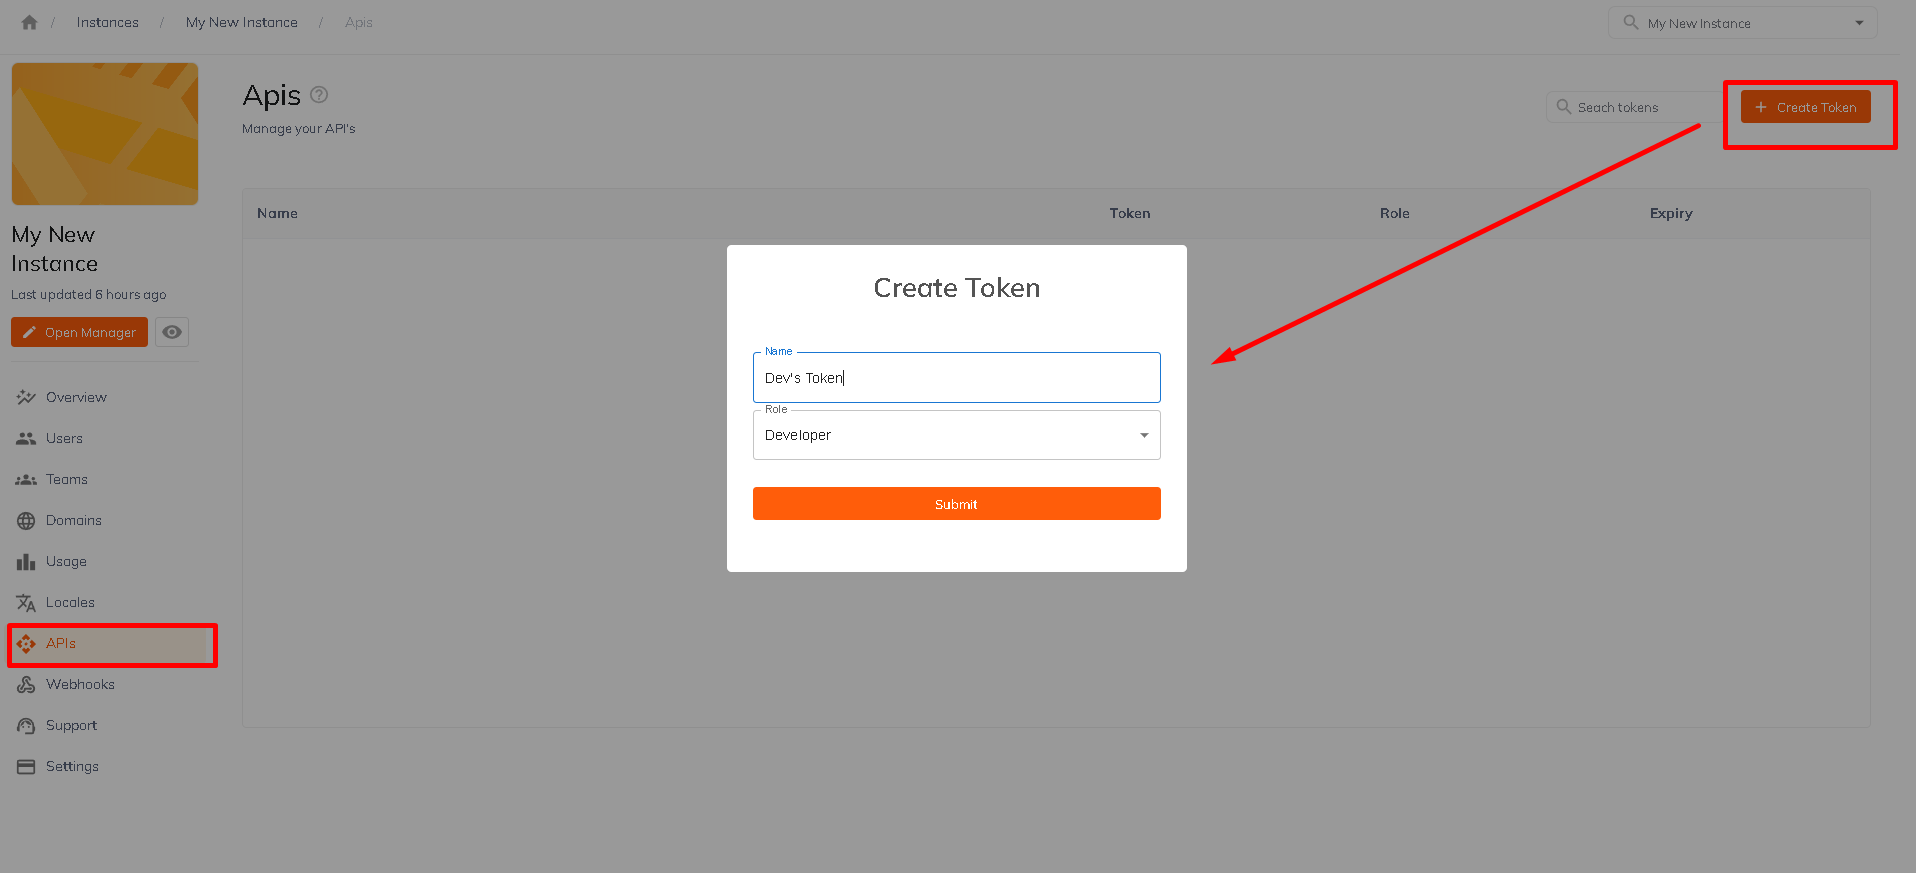
Access Tokens
Access tokens can be created for a variety of uses. Including to gain access to your instance via Atom IDE plugin, Node SDK as well as other workflows.
These will need to be renewed every 90 days and can be so directly in the instance settings as shown below.
Next Steps
After configuring your project, you can begin adding your content and creating your views. Continue to Content Manager for more information.